How to Troubleshoot QuickBooks scheduled backup is not working issue?
Crucial QuickBooks files are routinely backed up via the automated backup function in QuickBooks. Users can schedule the backup using the functionality, ensuring that QuickBooks backs up the data even if the user forgets to do so. It is crucial to back up key data because doing so ensures the security of all QuickBooks-related essential data. The QuickBooks scheduled Backup is not working error message frequently interrupts the process of scheduled backup. This article shall attempt to clear out the air surrounding this issue by providing useful ways to troubleshoot QuickBooks scheduled backup is not working issue.
Primary causes for Scheduled Backup is not working in
QuickBooks
You should first take a review of the
possible reasons behind this QuickBooks problem before moving on to the
troubleshooting steps. Here is a list of a few of the more significant causes
behind this error:
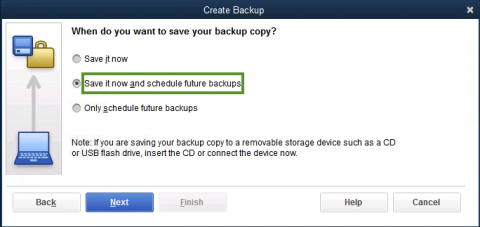
• Incorrect backup scheduling in QuickBooks.
•
QuickBooks is set up to work
with a different version of Windows.
•
Damage to the company file hampering
the automatic scheduled backup in QuickBooks.
•
The QuickBooks Desktop
application is out-to-date.
Ways to fixing QuickBooks scheduled backup not working
issue.
Below are given different ways of getting
the scheduled backup related issue fixed in QuickBooks Desktop application.
Way 1: Update QuickBooks
Different kinds of issues keep plaguing
QuickBooks application time and again. Intuit often releases upgrades to its
software as a preventative measure to arrest such technical issues. Therefore,
it is advised that users of QuickBooks get the software updated to the most
recent version.
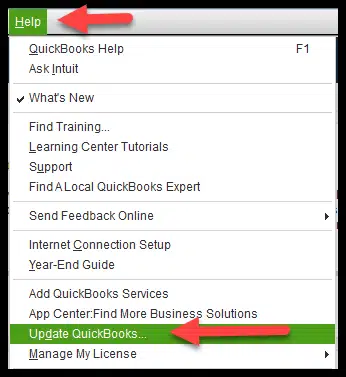
•
Select the Upgrade QuickBooks Desktop option under the Help menu to start off the update process.
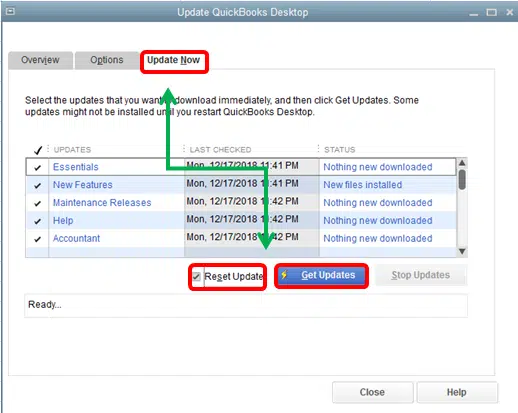
•
Now select the Get Updates option from the Update Now tab. This will prompt
QuickBooks to download all of the most recent updates.
•
Restart QuickBooks and choose Apply Update to install the updates
when prompted.
•
Try again to see if the setup
for automatic backup is working.
Way 2: QuickBooks should be launched as an administrator
It is always recommended to start
QuickBooks as an administrator to nullify any chances of errors causes due to
insufficient user permissions. The steps for the same are provided below:
•
Right-click the QuickBooks icon on
desktop and then opt for Properties.
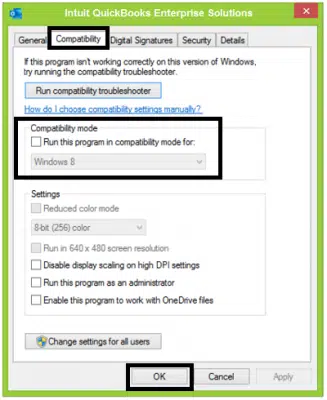
•
In the QuickBooks properties
window, select Run this software in
compatibility mode for by checking the box. Select Windows 10 from the drop-down selection next.
•
After that, tap on the option
of running the software as an
administrator from the box.
•
Finally, choose Apply, and then click OK to finish.
Way 3: Running QuickBooks in Compatible mode
The Run command box should be launched first
by pressing Windows + R. After that,
type the command "winver"
and the PC will show the current Windows version that is installed. The About
Windows pop-up window will display the current version of Windows.
•
After right-clicking the QuickBooks icon on the desktop, go to Properties.
•
Make sure the Run this software in compatibility mode
checkbox on the Compatibility tab in
properties is checked.
•
Select your current Windows
version by selecting it from the drop-down menu.
•
You must click OK once you click Apply.
Way 4: Take aid of the Verify & Rebuild Tool in
QuickBooks
The verify and rebuild tool, a crucial
component of QuickBooks, can be used to repair any harm brought on to the
company data. The problems with scheduled backups can also be fixed by
utilising this utility. You can simplify things by following the steps listed
below.
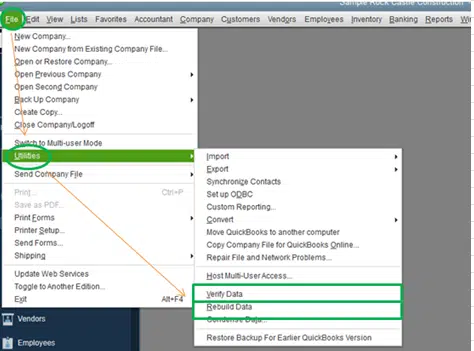
•
Launch QuickBooks Desktop to
get things started, and then head to utility
option found on the File tab.
•
Herein, select the option to verify data.
•
QuickBooks will now check the
company file for damage or corruption.
•
If QuickBooks displays Your
Data has Lost Integrity, close the notice and then click on the File tab once
more.

•
Select the Utilities tab and then proceed to the Rebuild Data option.
•
By selecting OK in the Backup Company Data popup box,
make a backup of your company file data on your desktop before beginning the
rebuild process.
•
When you click OK, the QuickBooks Rebuild Data tool
will repair the company file damage.
•
After you see the message
Rebuild has completed, click OK and attempt setting the automatic backups once
more.
Way 5: Leverage QuickBooks Clean Install Tool
Use the QuickBooks Clean Install Tool to
reinstall the QuickBooks Desktop application if the scheduled backup feature is
still not working. The tool can be quite easily downloaded from the Intuit
website, and can be used to uninstall and reinstall QuickBooks on your computer
system. Take aid of this tool and then check for whether this walkway help
troubleshoot QuickBooks scheduled backup is not working issue.
Conclusions!
Our team of QuickBooks experts anticipates
that the problem should be repaired at this point after trying all the
different fixes to troubleshoot QuickBooks
scheduled backup is not working
issue. For further information or query redressal, contact our QuickBooks support
team at the helpline 1 800 761 1787 to get rid of any QuickBooks technical
intricacies.

Comments
Post a Comment