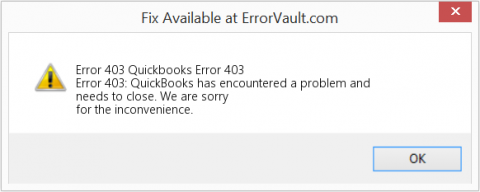
How to Get Rid of QuickBooks Error Code 403?
When a user tries to get the newly rolled out QuickBooks Desktop updates installed on his/her system, QuickBooks error 403 might appear on display. This infuriating aberration appears primarily because the software is unable to access the website due to erroneous settings of the Internet or due to a flawed internet connection. However, these are not the only instigators behind this error. If you are also experiencing this error and want an instantaneous resolution for the same, then this article will not only help you get through the steps to resolve QuickBooks Error 403 but also equip you with other relevant information.
Factors that cause QuickBooks error 403
Various factors that might result in QuickBooks error 403 are
listed below.
•
Restricted access to the Internet can embolden error 403 in
QuickBooks.
•
QuickBooks is unable to access the Internet due to a firewall
halting the accounting program's functionalities.
•
A virus or malware attack can cause damage to the QuickBooks
files, thereby paving the way for QuickBooks Error 403.
•
Erroneous internet connection configurations may also provoke
this error.
•
Damage caused to the QuickBooks registry keys in the Windows
registry.
•
The user might be using a QuickBooks version that hasn't been
updated for a long time.
Rectification of Error 403 in QuickBooks by easy
techniques
QuickBooks Error 403 can be fixed in a number of ways. Below
are given the various techniques for easy resolution of the error.
1st Technique: Updating QuickBooks Desktop
•
In the inception, launch
QuickBooks by double-clicking its desktop icon while holding the Ctrl + Shift keys down. The No Company Open message shows up.
•
After that, click on the Help
tab and then move to the Update QuickBooks Desktop option.
•
Herein, pick Get
Updates under the Update Now
option.
•
After the update procedure is finished, tap on Close.
2nd Technique: Check internet connectivity through the
Internet Explorer
•
Press the Win and R
keyboard keys simultaneously. This will display the Run command window.
•
Type iexplore in
the Run window and then hit on OK.
•
Now, try opening some random URL to check your internet
connectivity.
3rd Technique: Make adjustments to the settings of Proxy
Server

•
Initially, tap on the Windows
and R keys at the same time to open the Run window.
•
After that, type in inetcpl.
cpl and then hit on OK( or press
the Enter key). The Internet Properties will appear.
•
Now, advance to the Connections
tab.
•
Then, opt for LAN
Settings.
•
Remove the mark beside the option Use a proxy server for your LAN box under Proxy Server.
•
To conclude, hit on OK.
4th Technique: Perform a disk cleanup

•
Click on the start
menu. Now, type command in the search box.
•
Choose the Enter
key while holding down the Ctrl + Shift
keys.
•
Then, pick yes
from the permission dialogue box to open the command prompt.
•
Herein, introduce the word cleanmgr within the command prompt.
•
Opt for the boxes corresponding to the categories to clean.
•
Finally, click on OK.
5th Technique:
QuickBooks File Doctor Tool
The QuickBooks Doctor File Tool can be used to troubleshoot
QuickBooks company and network-related errors, including Error 403. The steps
below should help you use this Tool:
•
Download the
QuickBooks Doctor File Tool from the Official
website of Intuit. Alternatively, download the QuickBooks Tool Hub and install it
to use the File Doctor tool within the Tool Hub.
•
After installing the Tool, use the Tool to check for Internet connectivity.
•
Correct any recognized issues using the Tool.
•
Watch for the procedure to finish. After completing the
steps, restart QuickBooks to see if the QuickBooks Error 403 has been resolved.
Conclusion!
You shouldn't experience QuickBooks Error 403 anymore after
completing the troubleshooting instructions enumerated above. However, if it
still keeps annoying you, then get in touch with our QuickBooks support
professionals for a speedy resolution of
error 403 in QuickBooks. We can be contacted through the helpline 1 800 761
1787 or by using the Live chat.

Comments
Post a Comment