How to Resolve QuickBooks Error Code 7300?
QuickBooks
accounting software comes with a myriad of features and utilities that make it
the undisputed leader in the global market. However, the fact that the software
is fraught with technical errors cannot be overlooked. This article contains
all the methods to resolve the QuickBooks Error Code 7300. So, stick
around till the end of this article.
When the user accesses the company file in
QuickBooks, the error code 7300 may show up and hamper your QuickBooks
operations by preventing you from using the software. There may be several
reasons that may cause this error. One such factor is the malfunctioning of the
Intuit sync manager. Apart from that, there may be several other causes behind
the error. We shall cover all those causes and subsequently dive into the
various methods of troubleshooting
the QuickBooks Error code 7300.
Causes behind the QuickBooks error code 7300
The chief causes that lead to the QuickBooks
Error code 7300 constitute the following:
•
The Intuit sync manager may
have stopped functioning.
•
When the user accesses a
corrupted/damaged company file.
Reliable
Methods to Fix the QuickBooks Error Code 7300
After examining the primary causes behind
the QuickBooks Error Code 7300, we will discuss the methods to
effectively resolve the error. To fix the error, implement each of the
below-listed methods sequentially. So, let's begin and get this error code
wiped out from your computer.
Method 1: Backup QB-related Registry Entry
•
Hit on the 'Start' menu.
•
Now, type in 'Command'
into the 'search' box without pressing the 'Enter' key.
•
Before hitting the 'Enter'
key, hold down the 'Ctrl and Shift' keys simultaneously.
•
A permission dialogue box will
now appear on your screen.
•
A black window with a blinking
cursor will appear once. Hit on 'Yes.'
•
In this screen, type in 'Regedit'
and then hit 'Enter.'

•
This will open the Registry
Editor window, where you must choose the key associated with QuickBooks
error 7300.
•
Now, choose the 'Export'
option from the 'File' menu.
•
Locate the place on your PC
where you wish to store the QuickBooks backup file from the Save in the list.
•
In the 'File Name' box,
type the name you want to assign to the backup file.
•
Make sure the 'Selected
branch' option is chosen in the 'Export Range' box.

•
Afterward, hit on the 'Save'
button.
•
You must then hit on the 'Save'
button. Make sure to save the file with a '.reg' file extension’.
Method 2: Rename
the Sync Manager Folder
•
To begin with, log out of
QuickBooks and close any open company files.
•
Check to check if your
QuickBooks application has the most recent update. You must update QuickBooks
if it isn't.
•
Right-click the Sync Manager
icon by going to the System Tray.
•
Hit on 'Exit.'
•
Next, search your computer for
the Sync Manager folder. Typically, the folder is located in:
o
C:\Users\username\AppData\Local\Intuit.
However, the location may differ.
•
Next, restart the computer and
launch the QuickBooks program.
•
The Sync Manager folder will be
created automatically when you open the QuickBooks software.
•
Lastly, check if the Error 7300
got fixed.
Method 3: Install
the QuickBooks software afresh
We've provided the procedures for this QuickBooks
Error 7300 fix according to the operating system. So, you must implement
the solutions in accordance with your system.
For Windows XP
•
Hit a click on the 'Start'
menu.
•
After that, choose the 'Program
and Features.'
•
Access the 'Control Panel.'
•
Navigate to the 'Add or
Remove Programs' tab.
•
Search the list of currently
Installed Programs for the 'QuickBooks software’.
•
Once located, choose it and
subsequently hit on 'Uninstall.'
•
To finish the un-installation,
adhere to the instructions as they appear on the screen.
•
Wait for the process to finish.
For Windows Vista and Windows
7
•
Locate the 'Control panel'
in the 'Start' menu.
•
In the Control Panel box, opt
for the 'Programs and Features' option.
•
Search for QuickBooks to look
for the relevant application.
•
Choose the QuickBooks software
and hit on the 'uninstall/change' button.
•
Your computer will display a
window that will walk you through the uninstallation process.
Windows 8
•
Access the Control panel from
the 'Start' menu.
•
In the 'Control Panel,'
proceed to the 'Programs and Features' option.
•
In the list that shows up,
search for the QuickBooks software.
•
Choose the uninstall/change
button.
•
Follow the on-screen directions
to complete the un-installation process.
When you are done, re-install the QuickBooks
Desktop software and see if the error code 7300 shows up. If it does, follow
the next method.
Method 4: Rename
Intuit Folders
By renaming the Intuit folders, you prevent
the QuickBooks software from gaining access to this folder upon re-installing
the same. However, due to its vitality, a new Intuit folder will be created,
and all the operations will be conducted from that folder. This shall help in
bypassing the previous folder, which may be prone to several errors and
technical glitches. Follow the steps below:
•
Initially, uninstall the
QuickBooks software.
•
Afterward, rename the Intuit
folders. Look for and rename the following paths:
o
C:\Users\(current
user)\AppData\Local\Intuit\QuickBooks (year)
o
C:\ProgramData\Intuit\QuickBooks
(year)
o
64-bit version C:\Program Files
(x86)\Intuit\QuickBooks (year)
o
Files\Intuit\QuickBooks (year)
•
You might see a notification
that reads 'Access forbidden' while carrying out the aforementioned
procedure. To correctly rename the folders in that situation, adhere to the
guidelines listed below.
•
Right-click on the Windows
taskbar and access the 'Task Manager.'
•
Hit on the 'Processes'
tab.
•
Next, choose the 'Column
header' and arrange it so that the list shows in alphabetical order.
•
Individually, hit on the QBDBMgrN.exe,
QBDBMgr.exe, QBCFMonitorService.exe, and Qbw32.exe services underneath the
image name column.
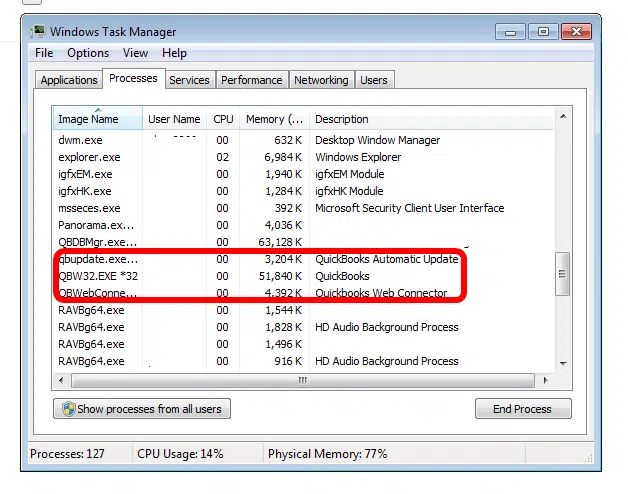
•
Next, hit on 'End process.'
•
When a message box appears,
choose 'Yes' to continue.
•
Finally, Install the
QuickBooks software again and launch it to verify if the error got stemmed
out.
As we draw to conclude this article, we
hope that the methods enlisted in this article helped you in resolving the
QuickBooks Error code 7300.
We sincerely hope that the contents of this article served your purpose. If you face a need of any assistance, you may reach out to our diligent QuickBooks error support team of experts who will assist you in the best possible way and will make sure that all your issues get rooted out.

Comments
Post a Comment